Happy Barnet

  • Happy Barnet Blog
  • Shhhh The Secret Book Swap
    • Shhhh The Secret Book Swap
  • Craft Challenge
  • About
  • Shop @ ByBarnet
    • Shop @ byBarnet
    • Gift Bags
    • Spoonies
    • Homeware
    • Clothing and Bags

How to: Make Bunting

February 03, 2019 by Laura Barnet in Craft Guides, How to

Bunting is a favourite decoration at many celebrations and it’s also just a nice touch to add to your home or even garden which makes it perfect not only as a project for you to make for yourself but also as a gift for others.

Whilst there’s a few steps to this, it’s still a perfect project for beginners as it’s simple and pretty quick to make!

Instructions are below for the length and size I’ve made, however you can obviously adapt this to suit your own preferences.

What you’ll need:

(The amounts will depend on how many pennants you want and their size, this is based on a string of 6 pennants approximately 5” x 7” when finished)

  • Fabric

    • I like to use a mix of patterns and colours but you can also use the same colour or any combination of coordinating or contrasting fabric you like

    • One fat quarter can cut out all 12 pieces based on this sized template.

  • Thread

  • Bias binding tape 25mm x 2.5m

  • Sewing machine

  • Pins, scissors, needle and thread

Time

  • Not long - about an hour

Skill Level

  • Basic sewing machine skills


Instructions - How to make bunting

Follow the step by step instructions with photos in the gallery. 
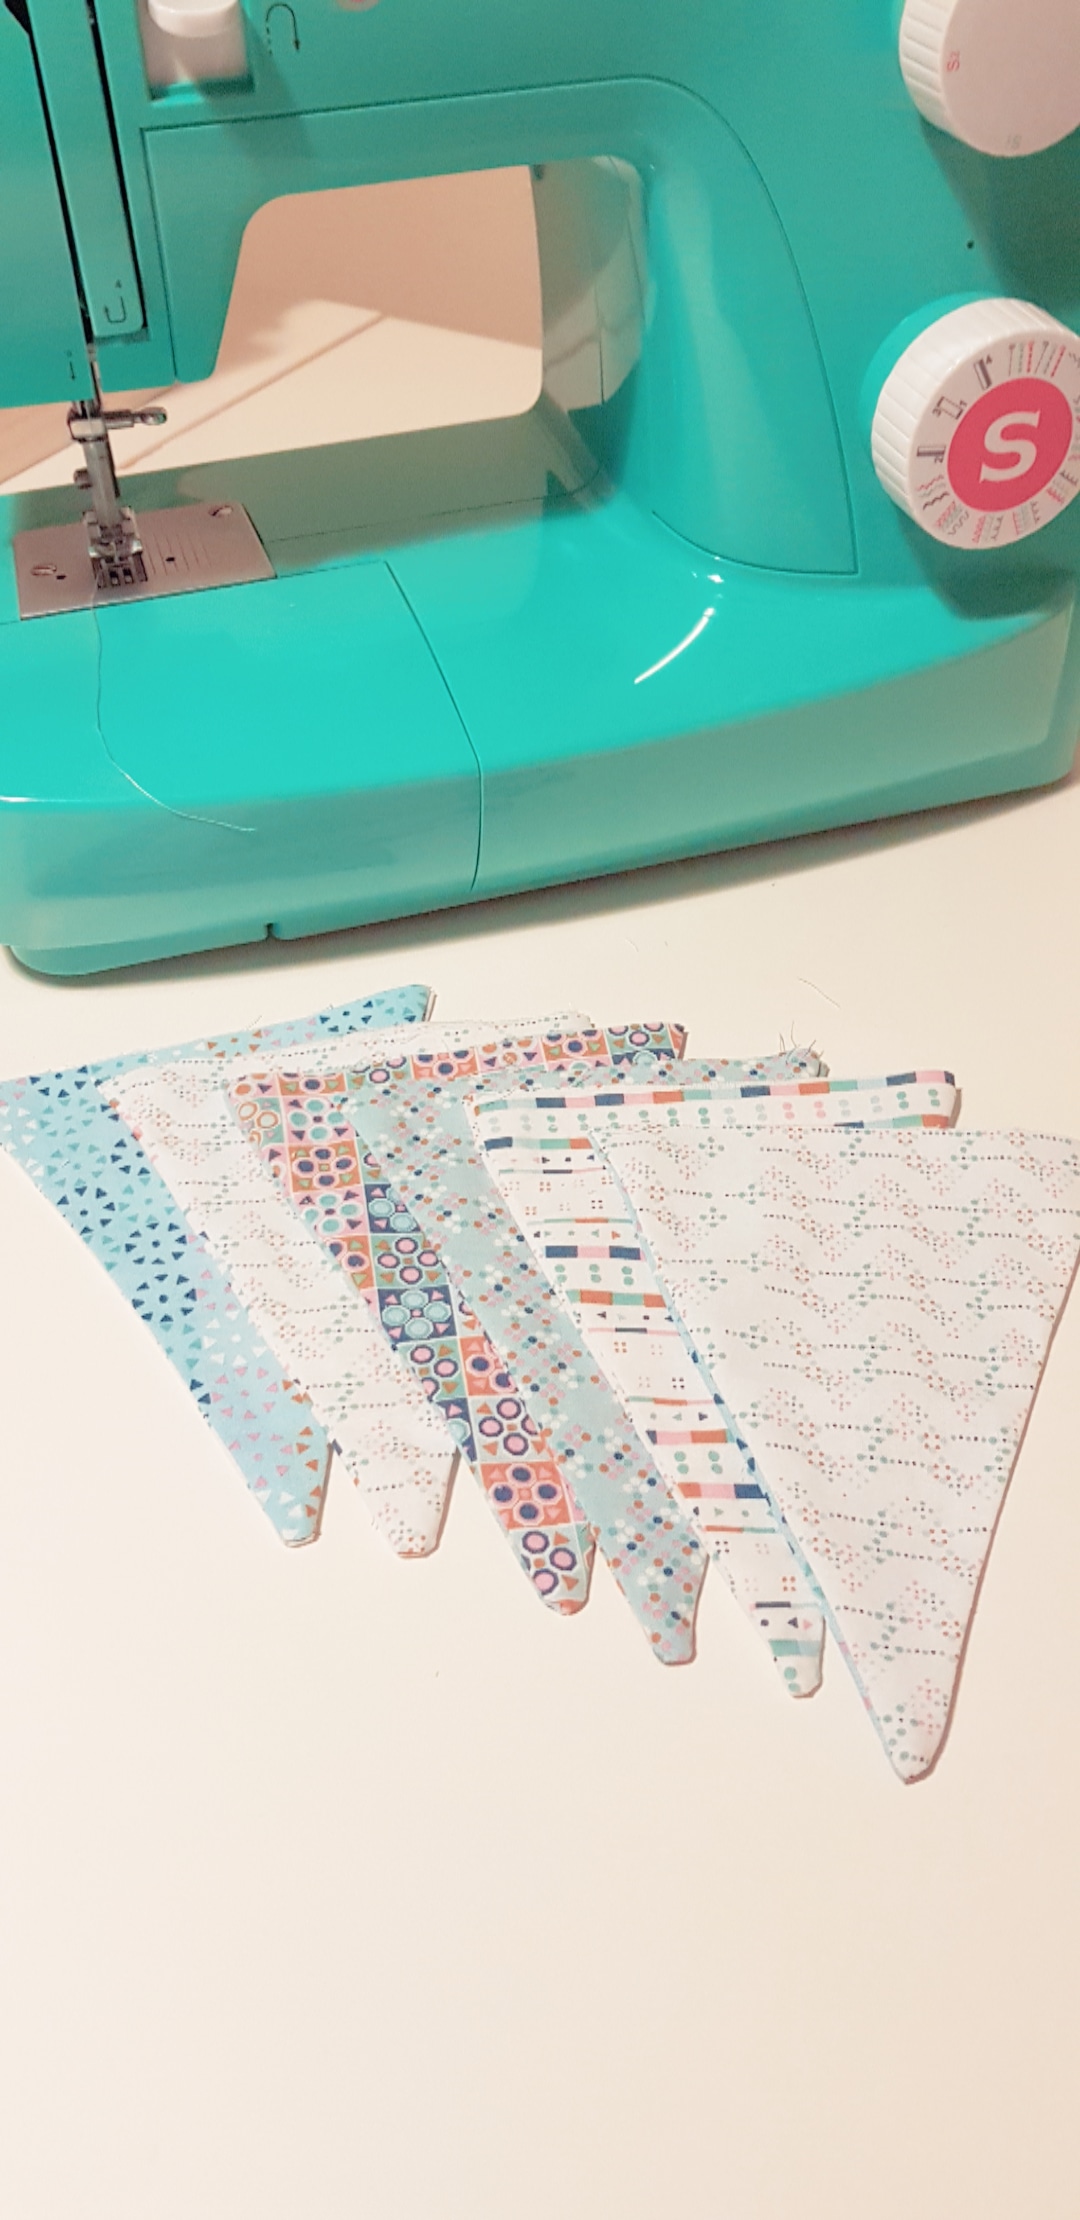
Step 1: Cut out triangles

Use a template slightly larger than you want the finished triangles to be.

Step 2: Match pieces together

You can use a single colour or coordinating or contrasting colours and patterns

Step 2: Pin together

Pin down the two log sides of your triangles

Step 3: Sew
Step 3: Sew

Sew around the outside of the triangles (long sides only)

Step 4: Trim & Turn
Step 4: Trim & Turn

Trim the point of the triangle and turn it the right side out.

Step 4: Trim again!
Step 4: Trim again!

Trim the extra pieces of fabric at the two top corners so the top is straight.

Step 5: Press
Step 5: Press

Press your pennants ready to join to your binding.

Step 5: Prepare binding

Unravel your binding

Step 5: Press binding

Fold and press in half length ways.

Step 6: Pin pennants

Measure and space out your pennants and pin inside the fold of the binding.

Step 7: Sew
Step 7: Sew

Sew all the pennants in place by sewing all the way from just before the first pennant through to just after the final pennant.

Ta-dah!
Ta-dah!

And you’re finished!

Matching gift bag
Matching gift bag

Step by step guide coming soon!

Step 1: Cut out triangles Step 2: Match pieces together Step 2: Pin together Step 3: Sew Step 4: Trim & Turn Step 4: Trim again! Step 5: Press Step 5: Prepare binding Step 5: Press binding Step 6: Pin pennants Step 7: Sew Ta-dah! Matching gift bag

Step 1

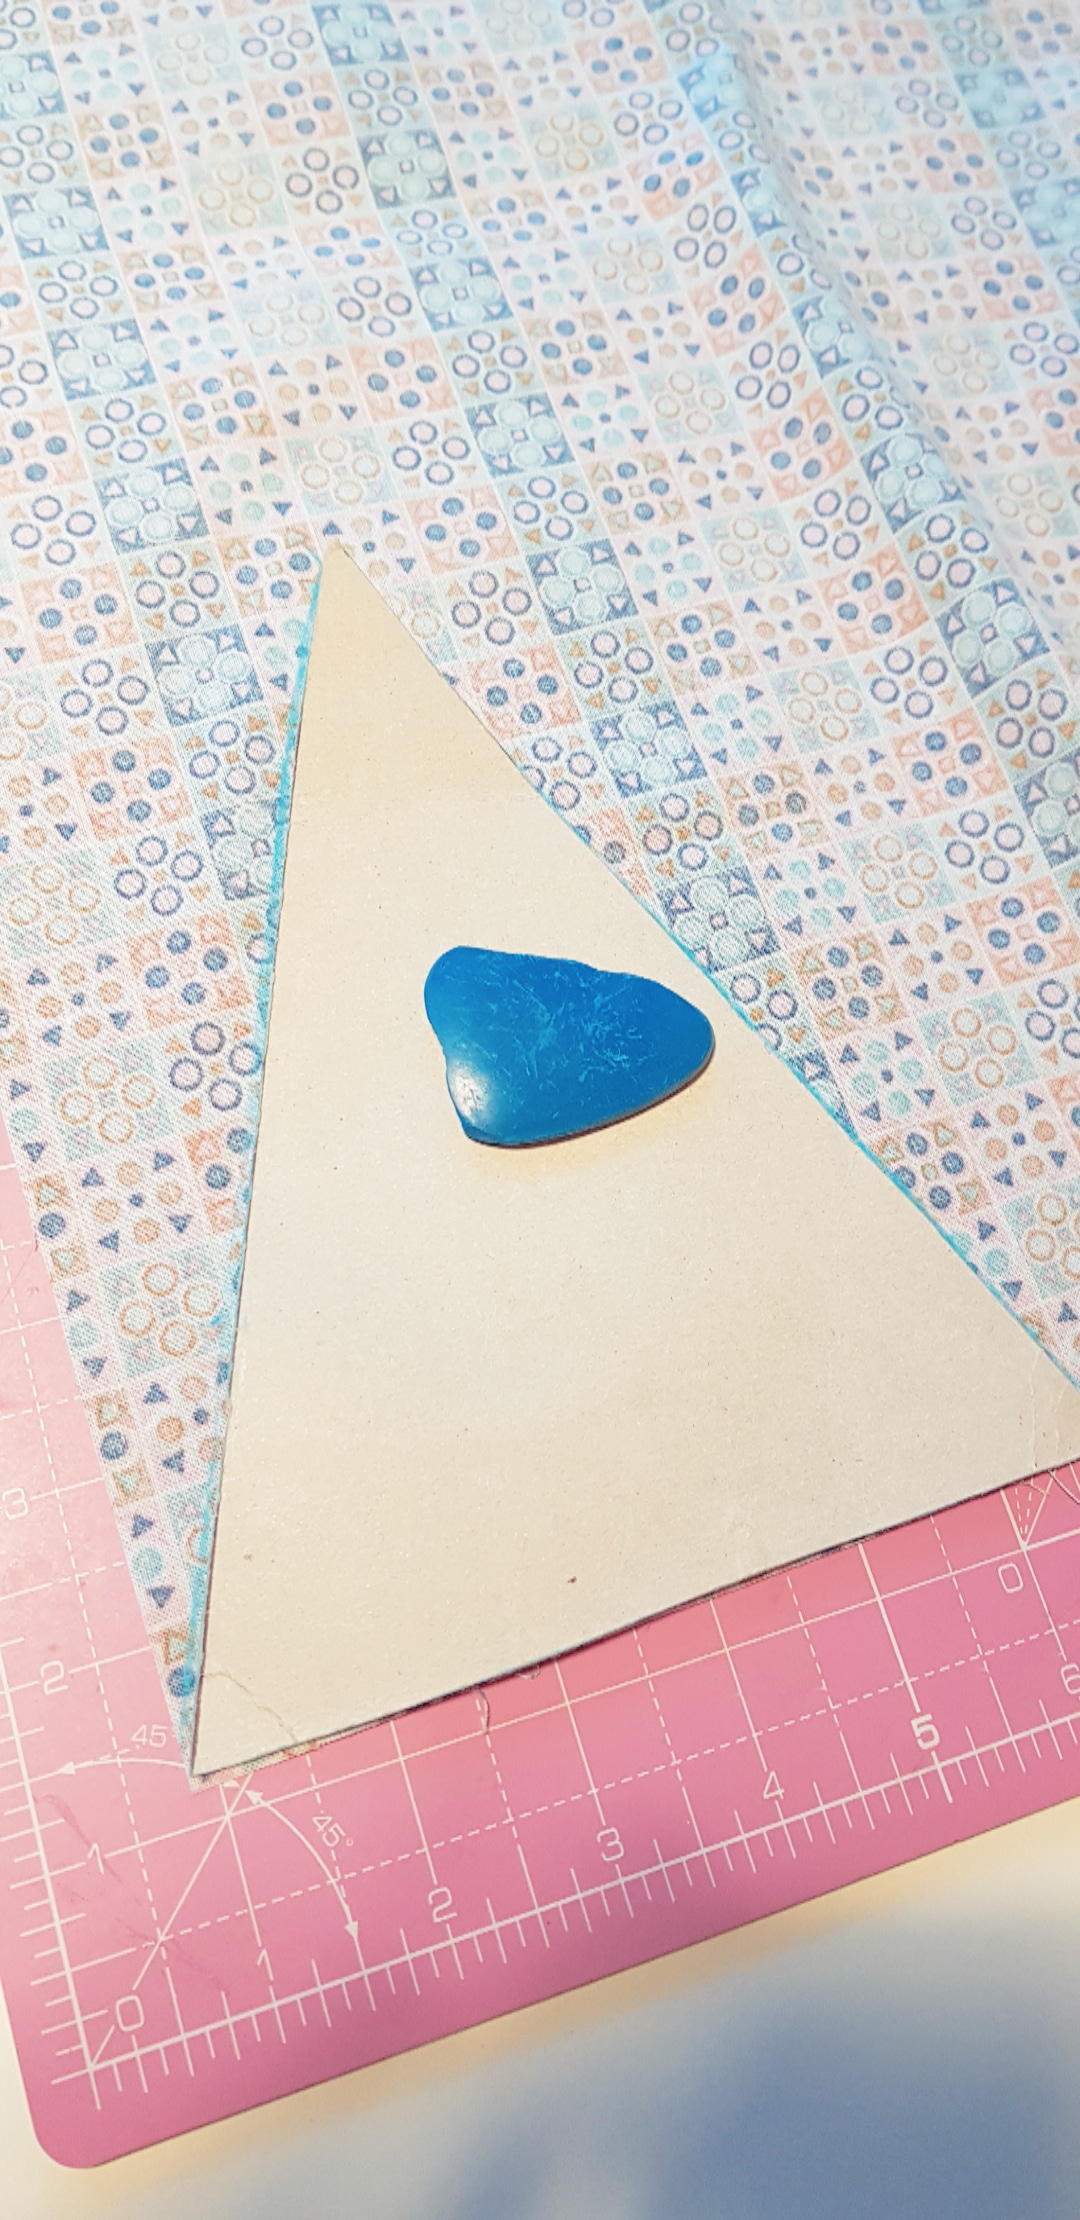
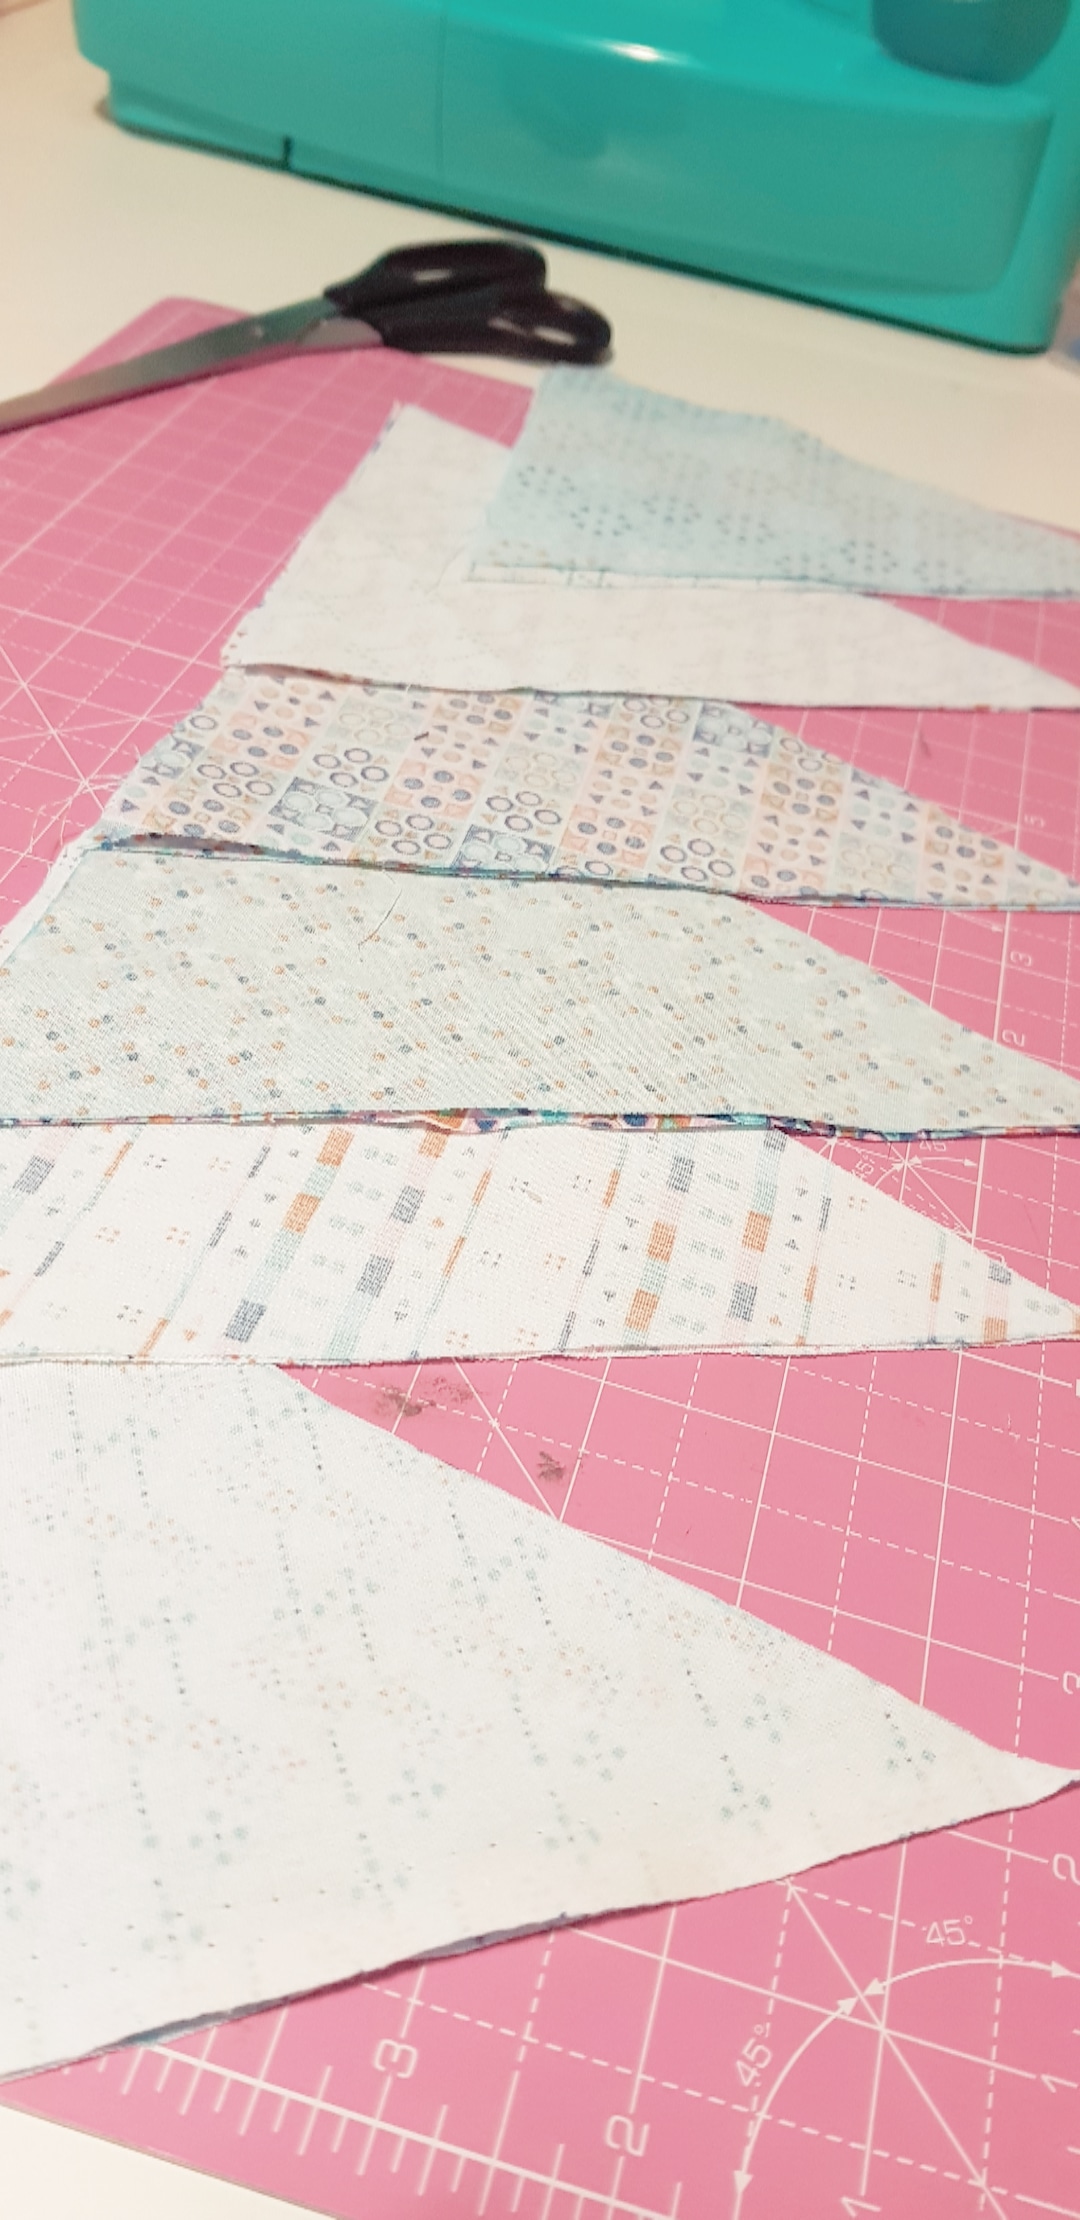
Use a template to draw and cut out 12 triangles from your fabric. My template is simply cut from cardboard but you can buy longer lasting plastic templates if you prefer. My template is 6” wide by 7.5” long (measured from the middle of the top, down to the point. Remember to cut your triangles slightly larger than you want your finished pennants to be.

Step 2

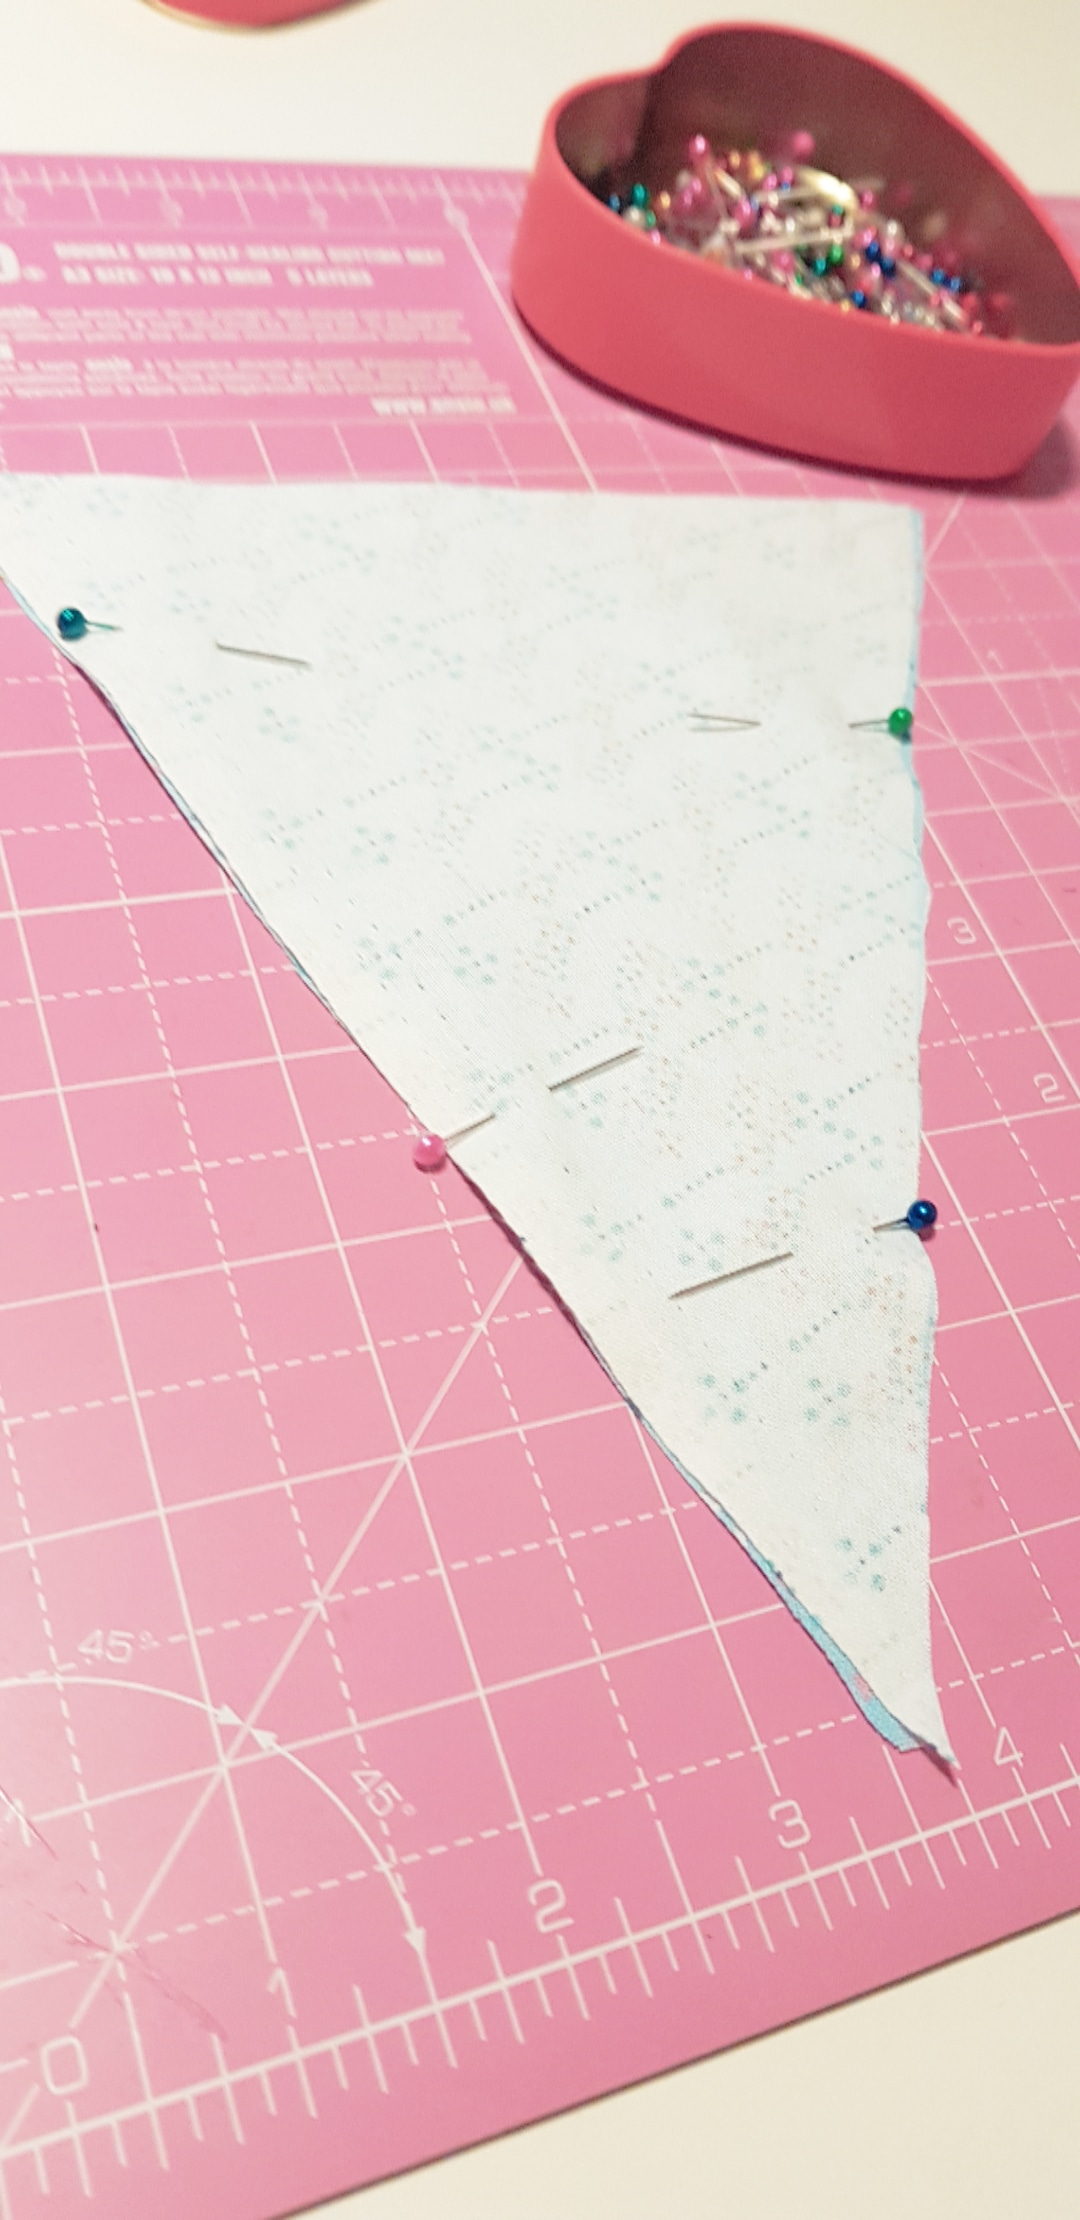
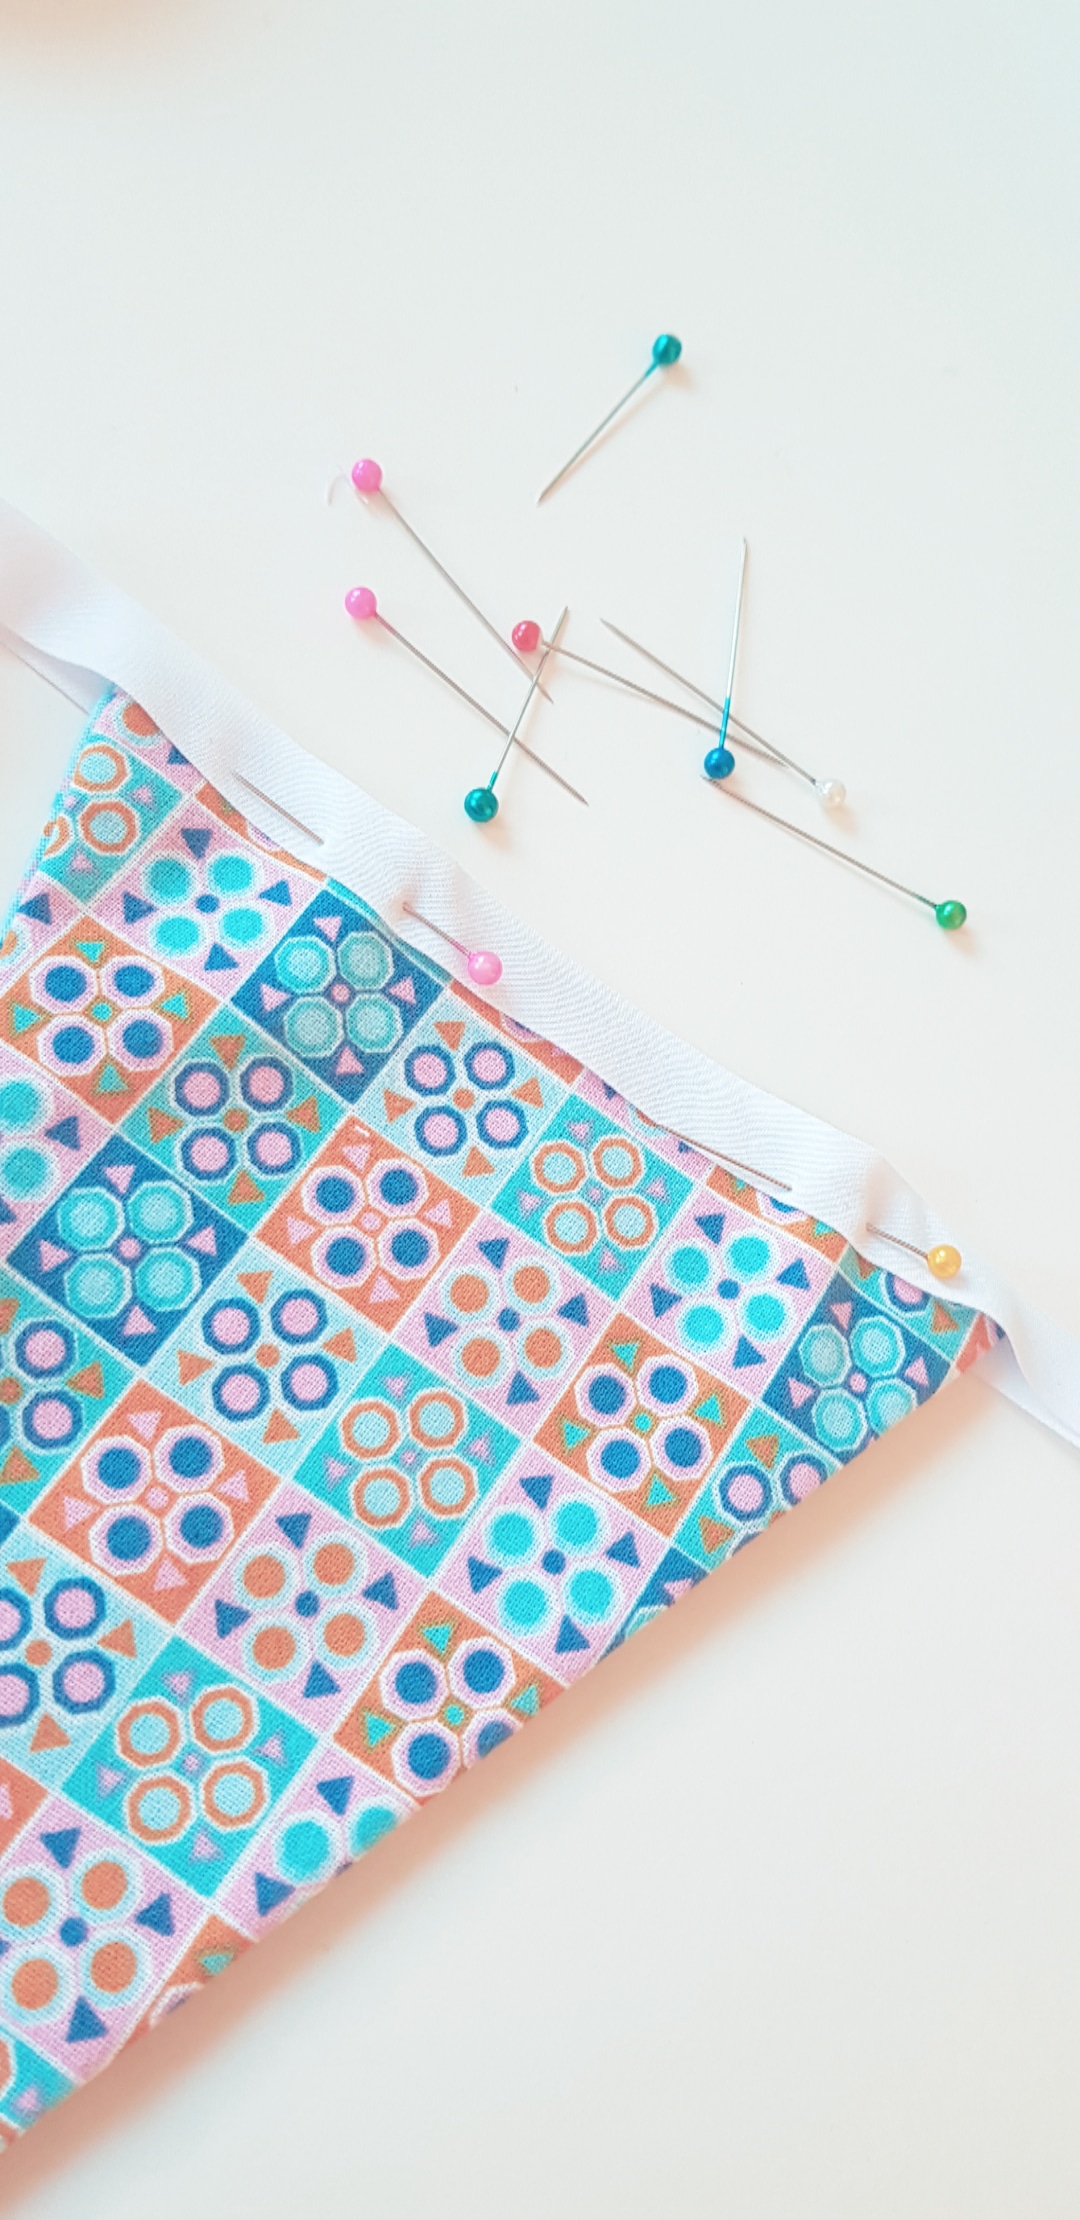
Match the pieces together in pairs, right sides facing, then pin together along the two long sides only.

Step 3

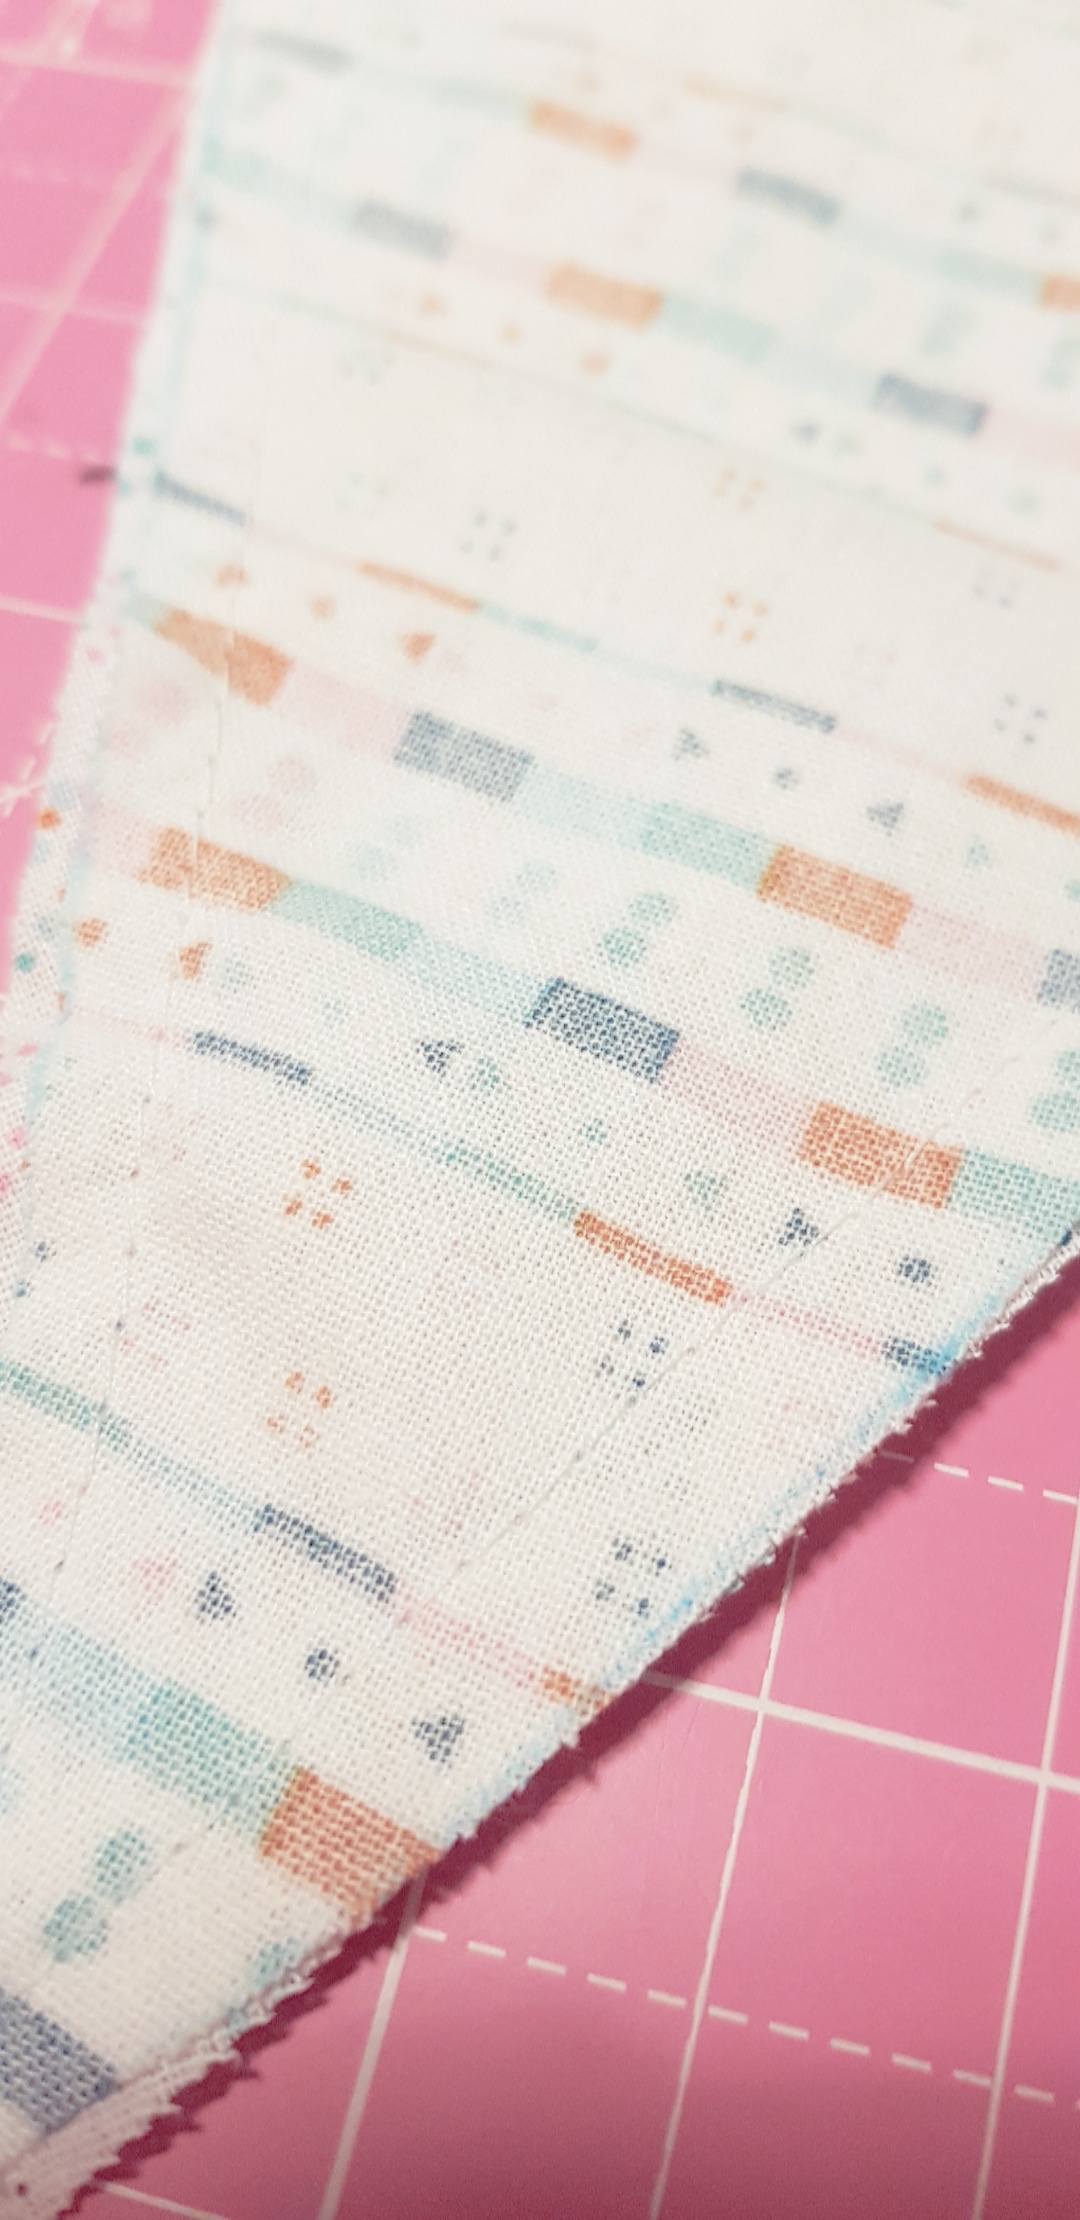
Sew around the outside of the triangles (long sides only) leaving the top side open, ready for you to turn it inside out.
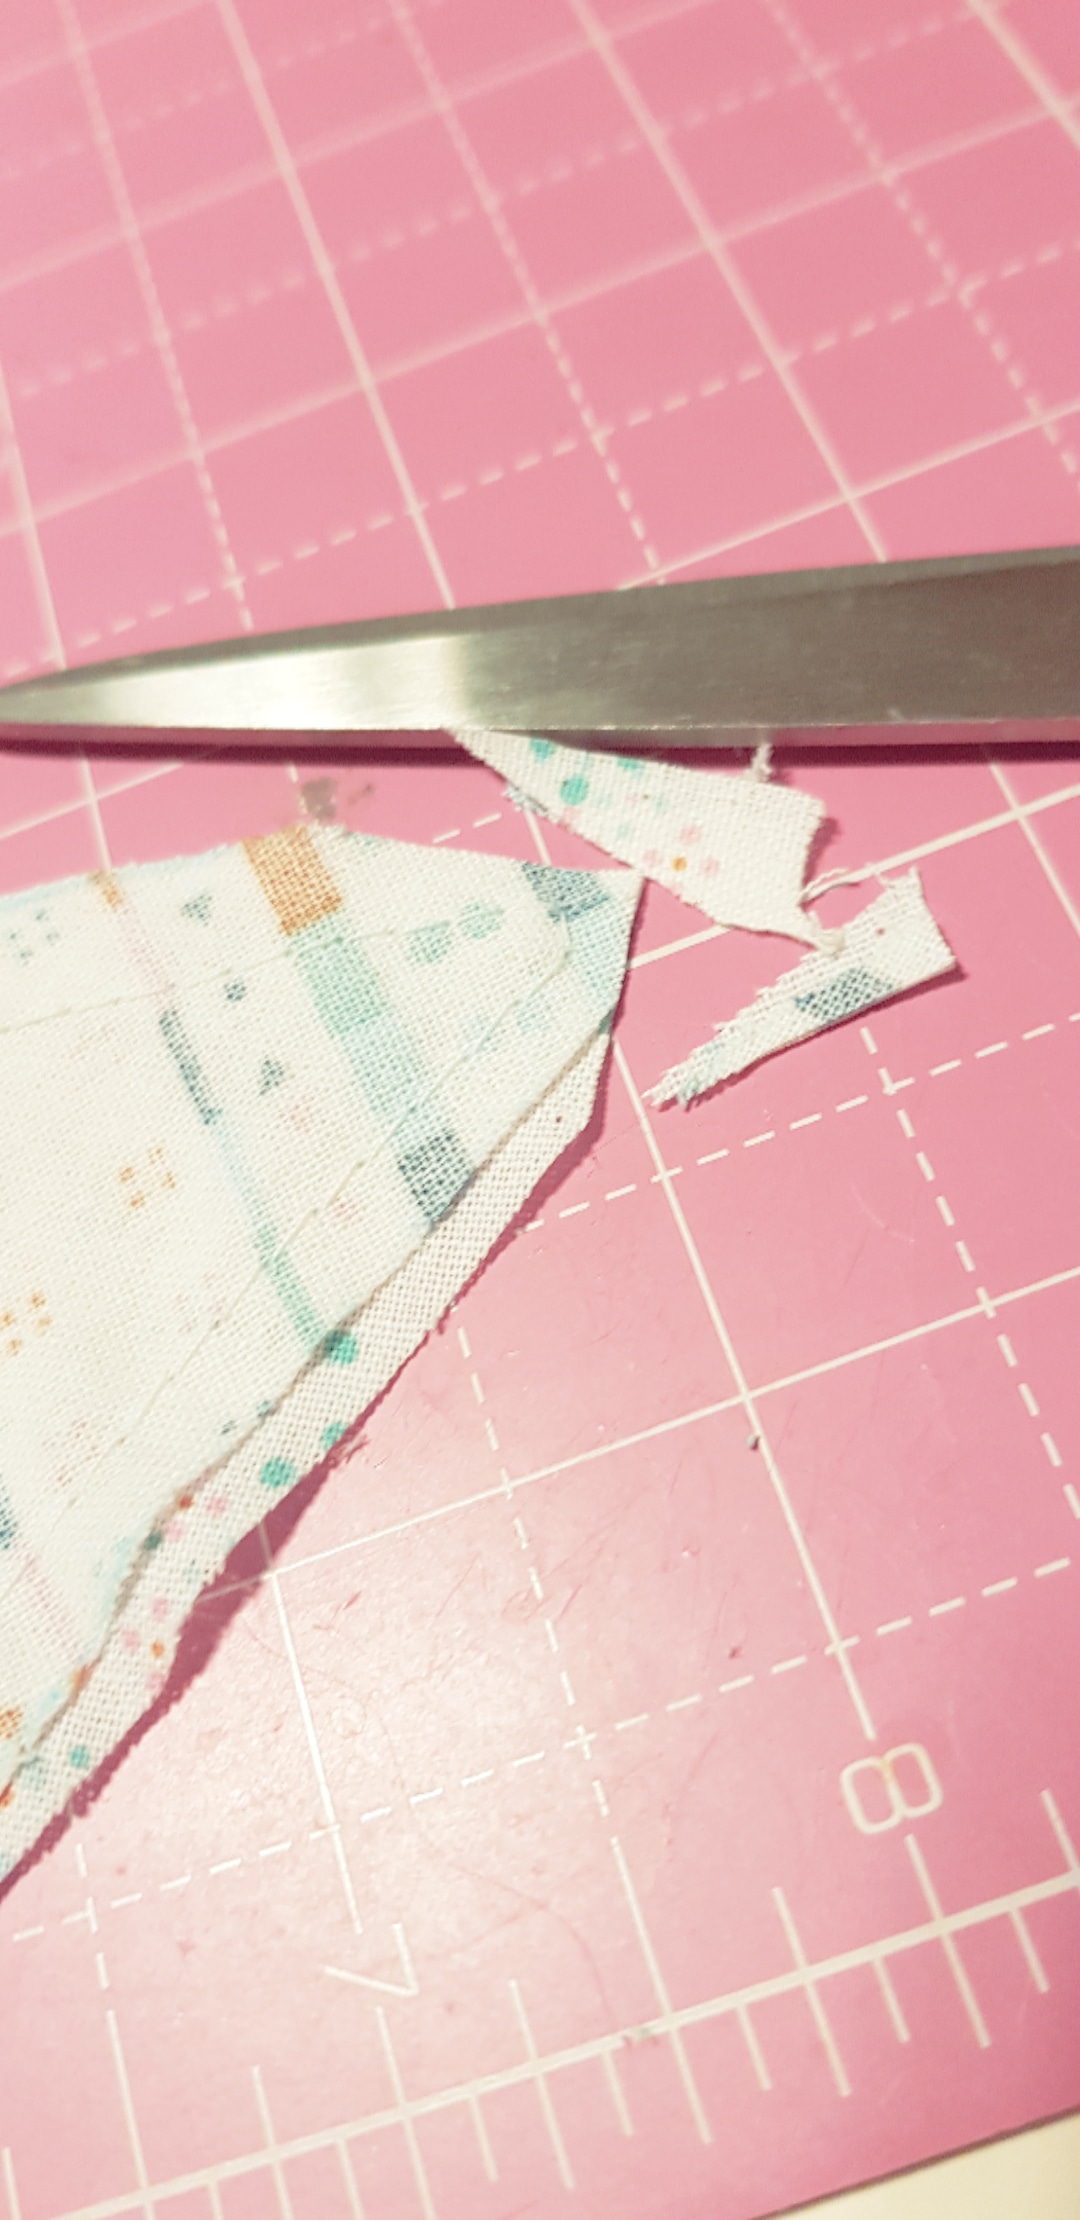
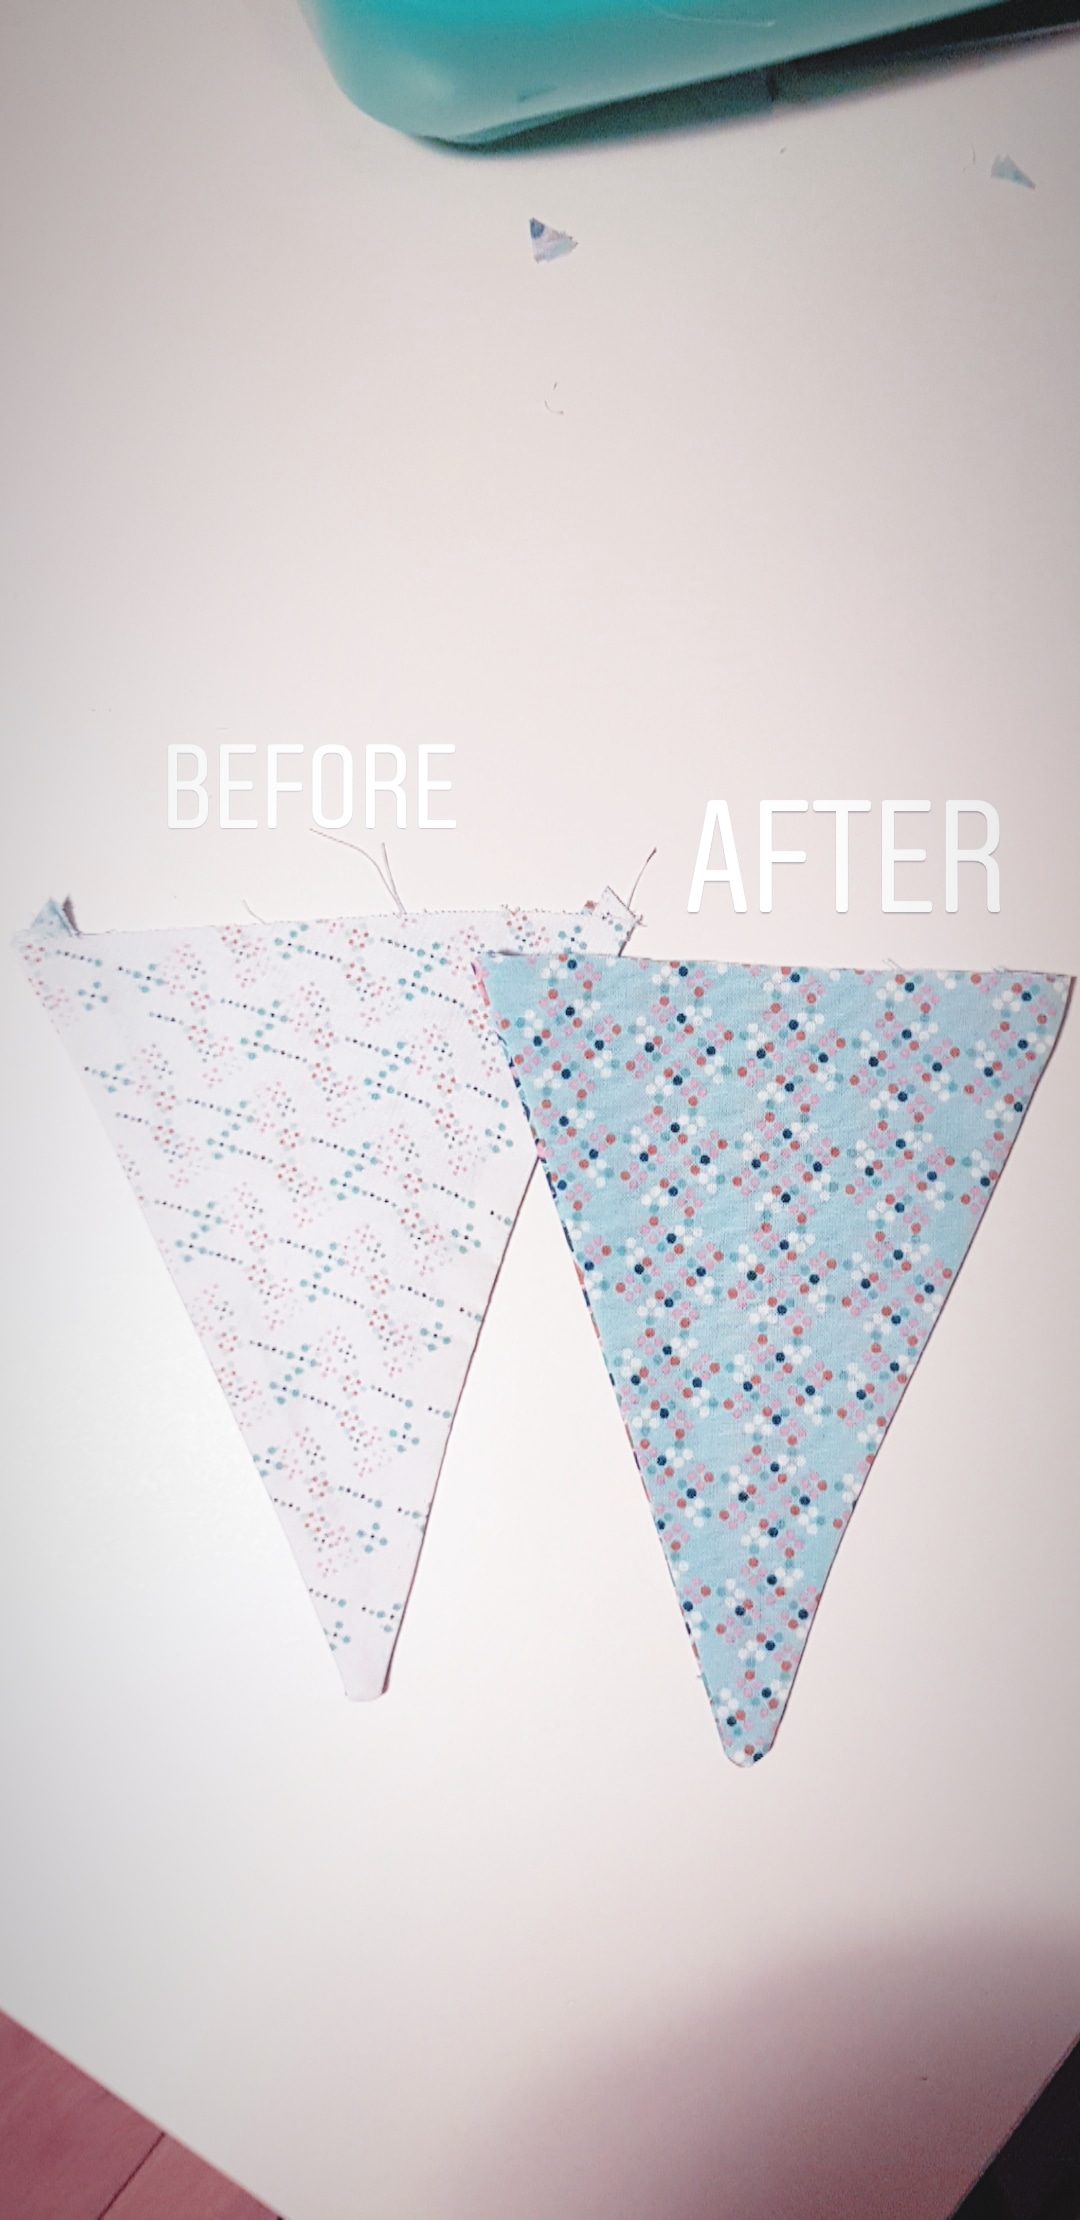
Step 4

Trip the point of the triangle then turn it inside out! (This should now be the correct way round with the right side outside). This is a good time to give it a press and trim the two pieces of extra bit of fabric in the two top corners (see the before and after photo).
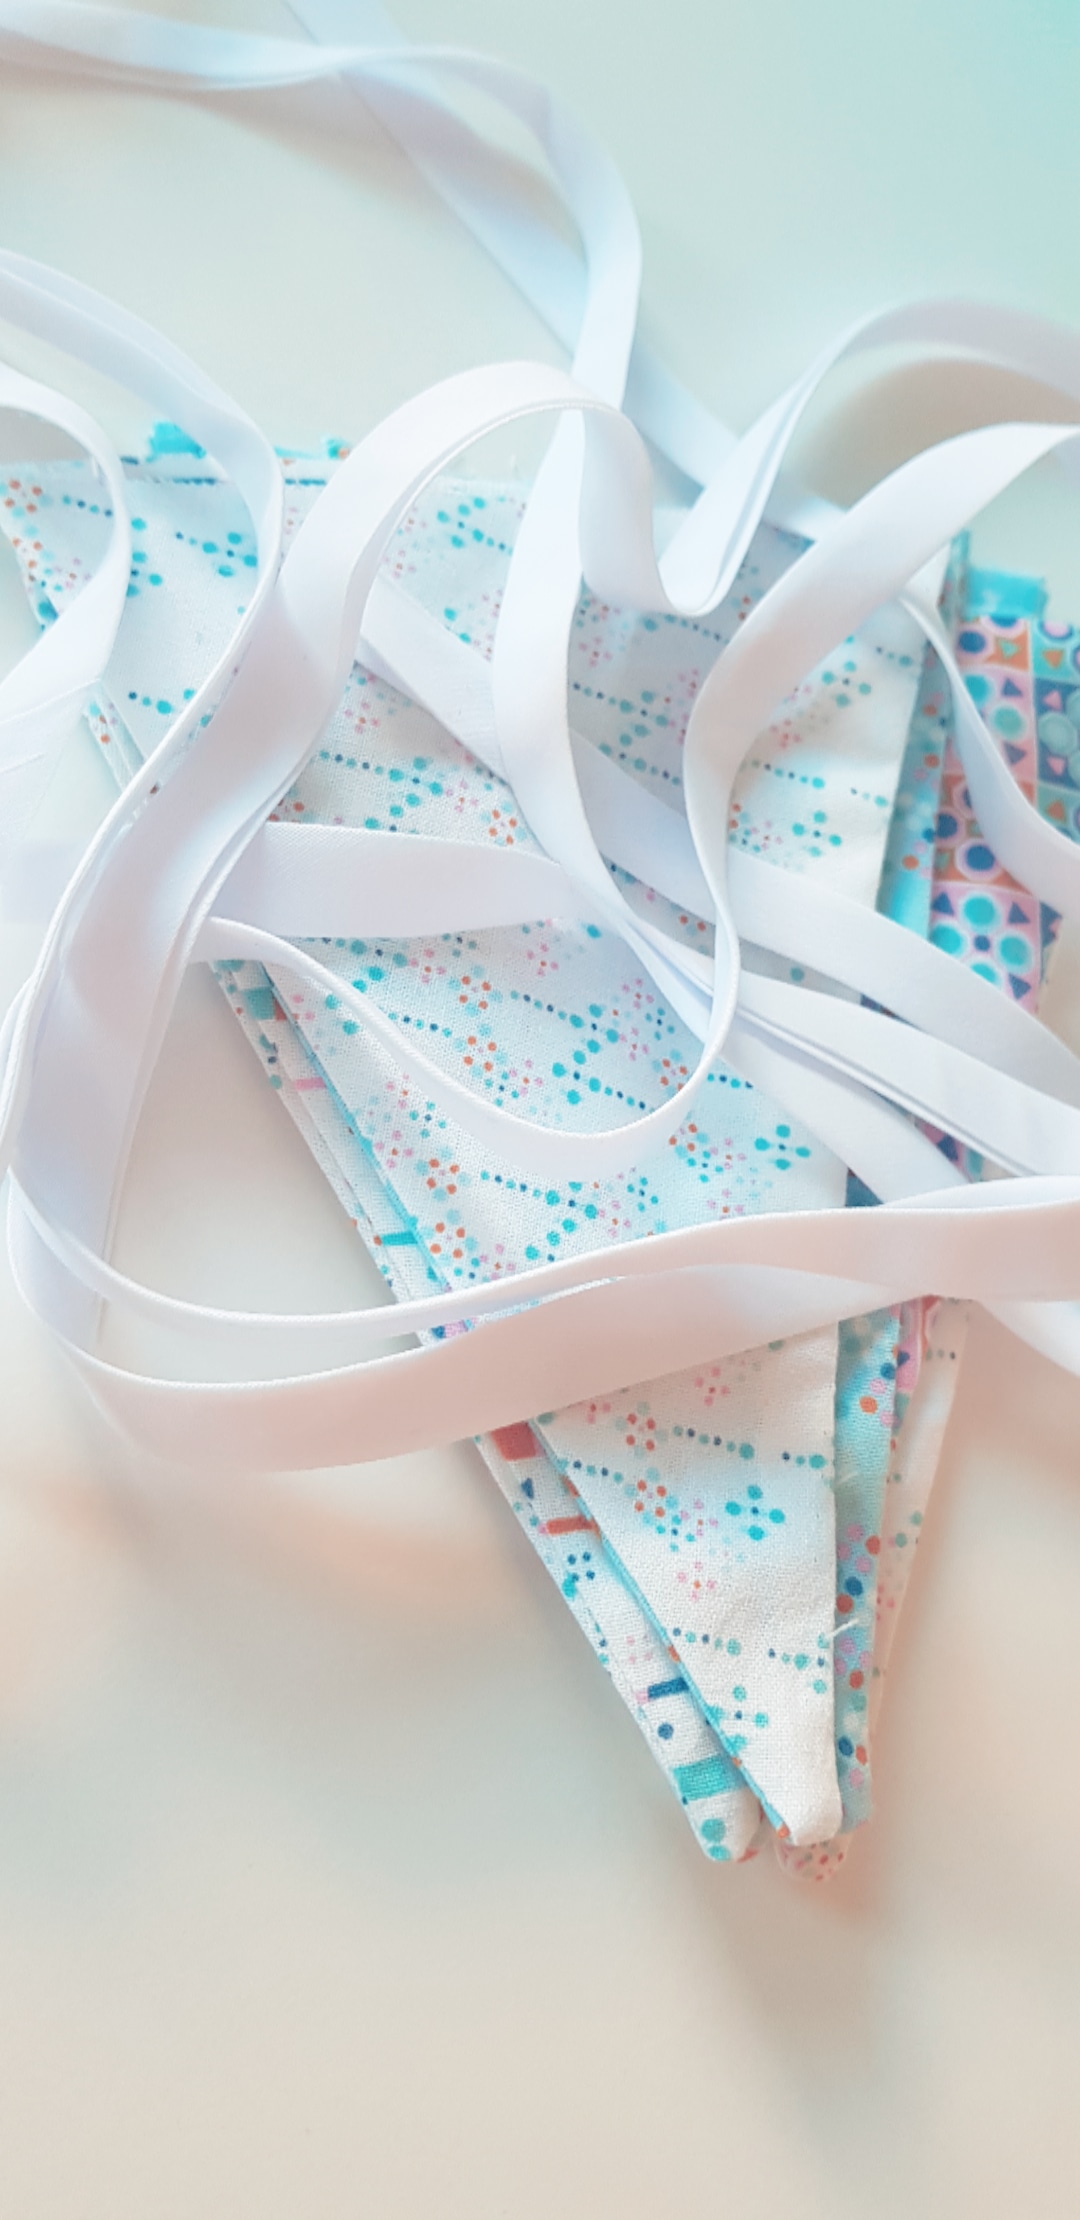
Step 5

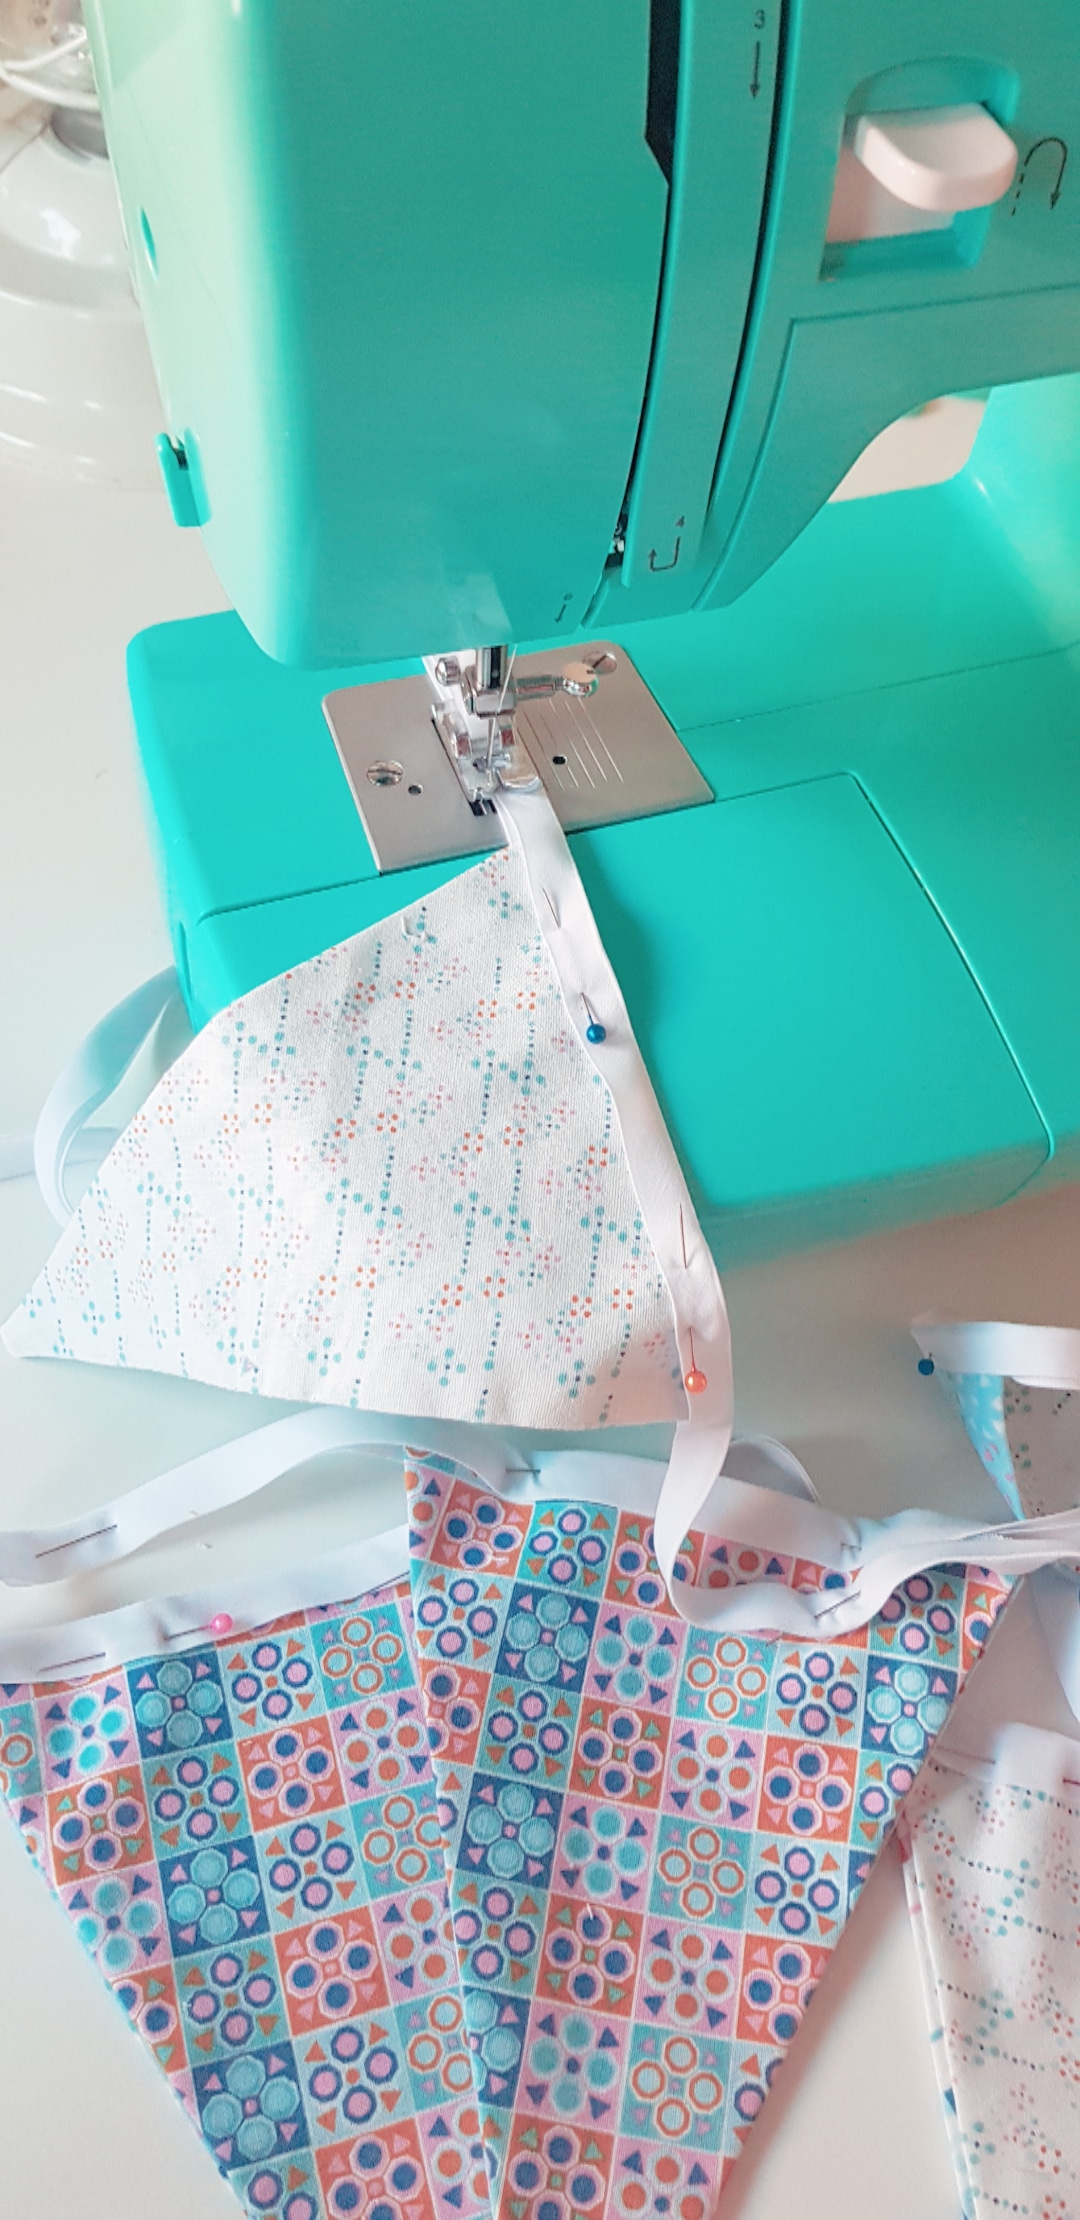
Your pennants are now finished and you are ready to attach them to your bias binding. To prepare your binding, unravel it, fold it in half length ways and press with an iron. This will make it easier to work with in the sewing machine.

Step 6

Pin your pennants in between the binding. For this length of binding and size of pennants you can leave 20” at the start of the binding, then pin the first pennant, then leave a gap of 6” between each pennant. This will leave you with another 20” at the other end. You can adjust this to suit your own pennant sizes or preferences. I would also recommend adding a pin in between each pennant to help hold the binding in place

Step 7

Sew from an inch or two before the first pennant all the way through to a couple of inches after the final pennant, taking care to ensure that both sides are secure.

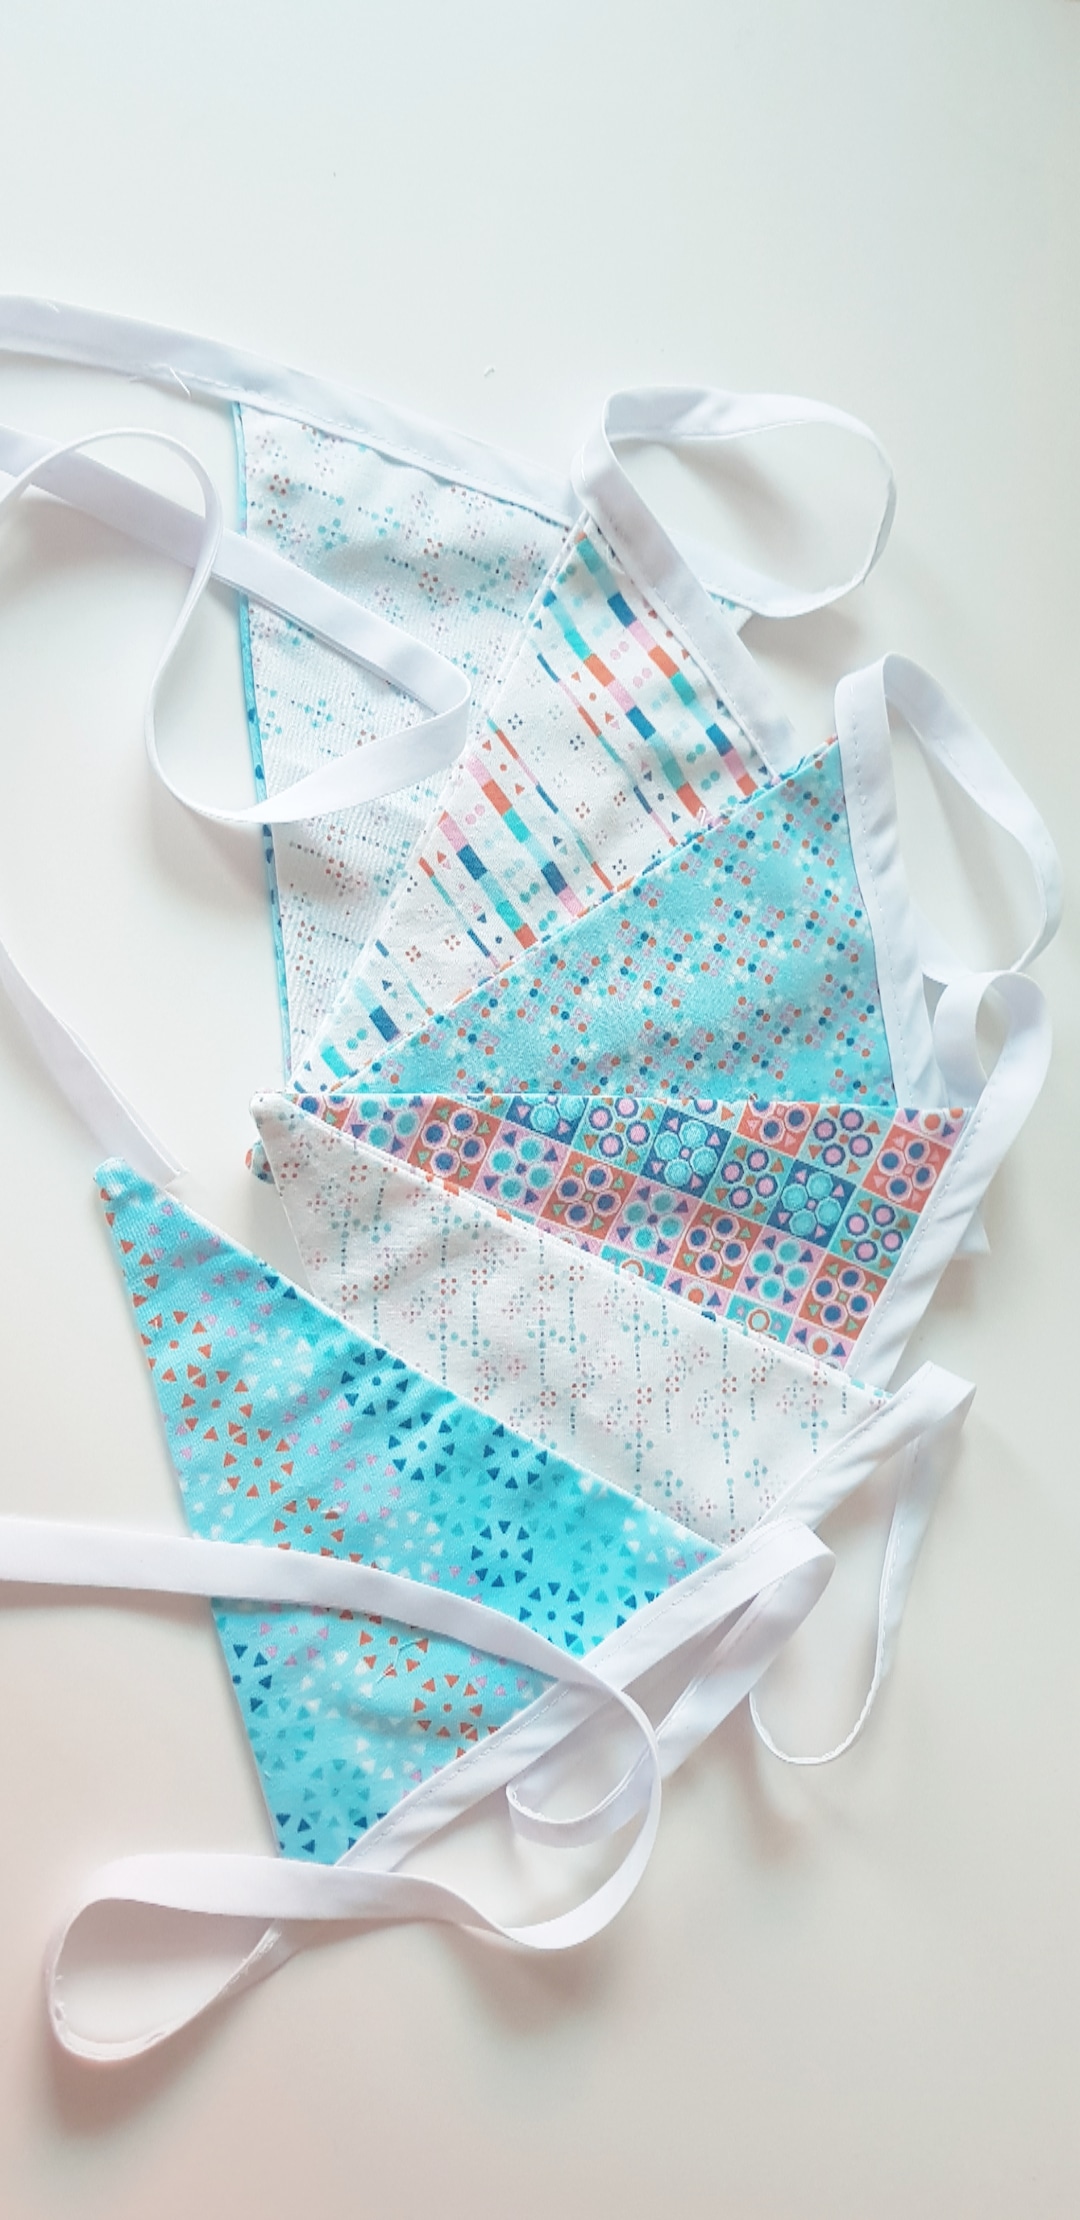
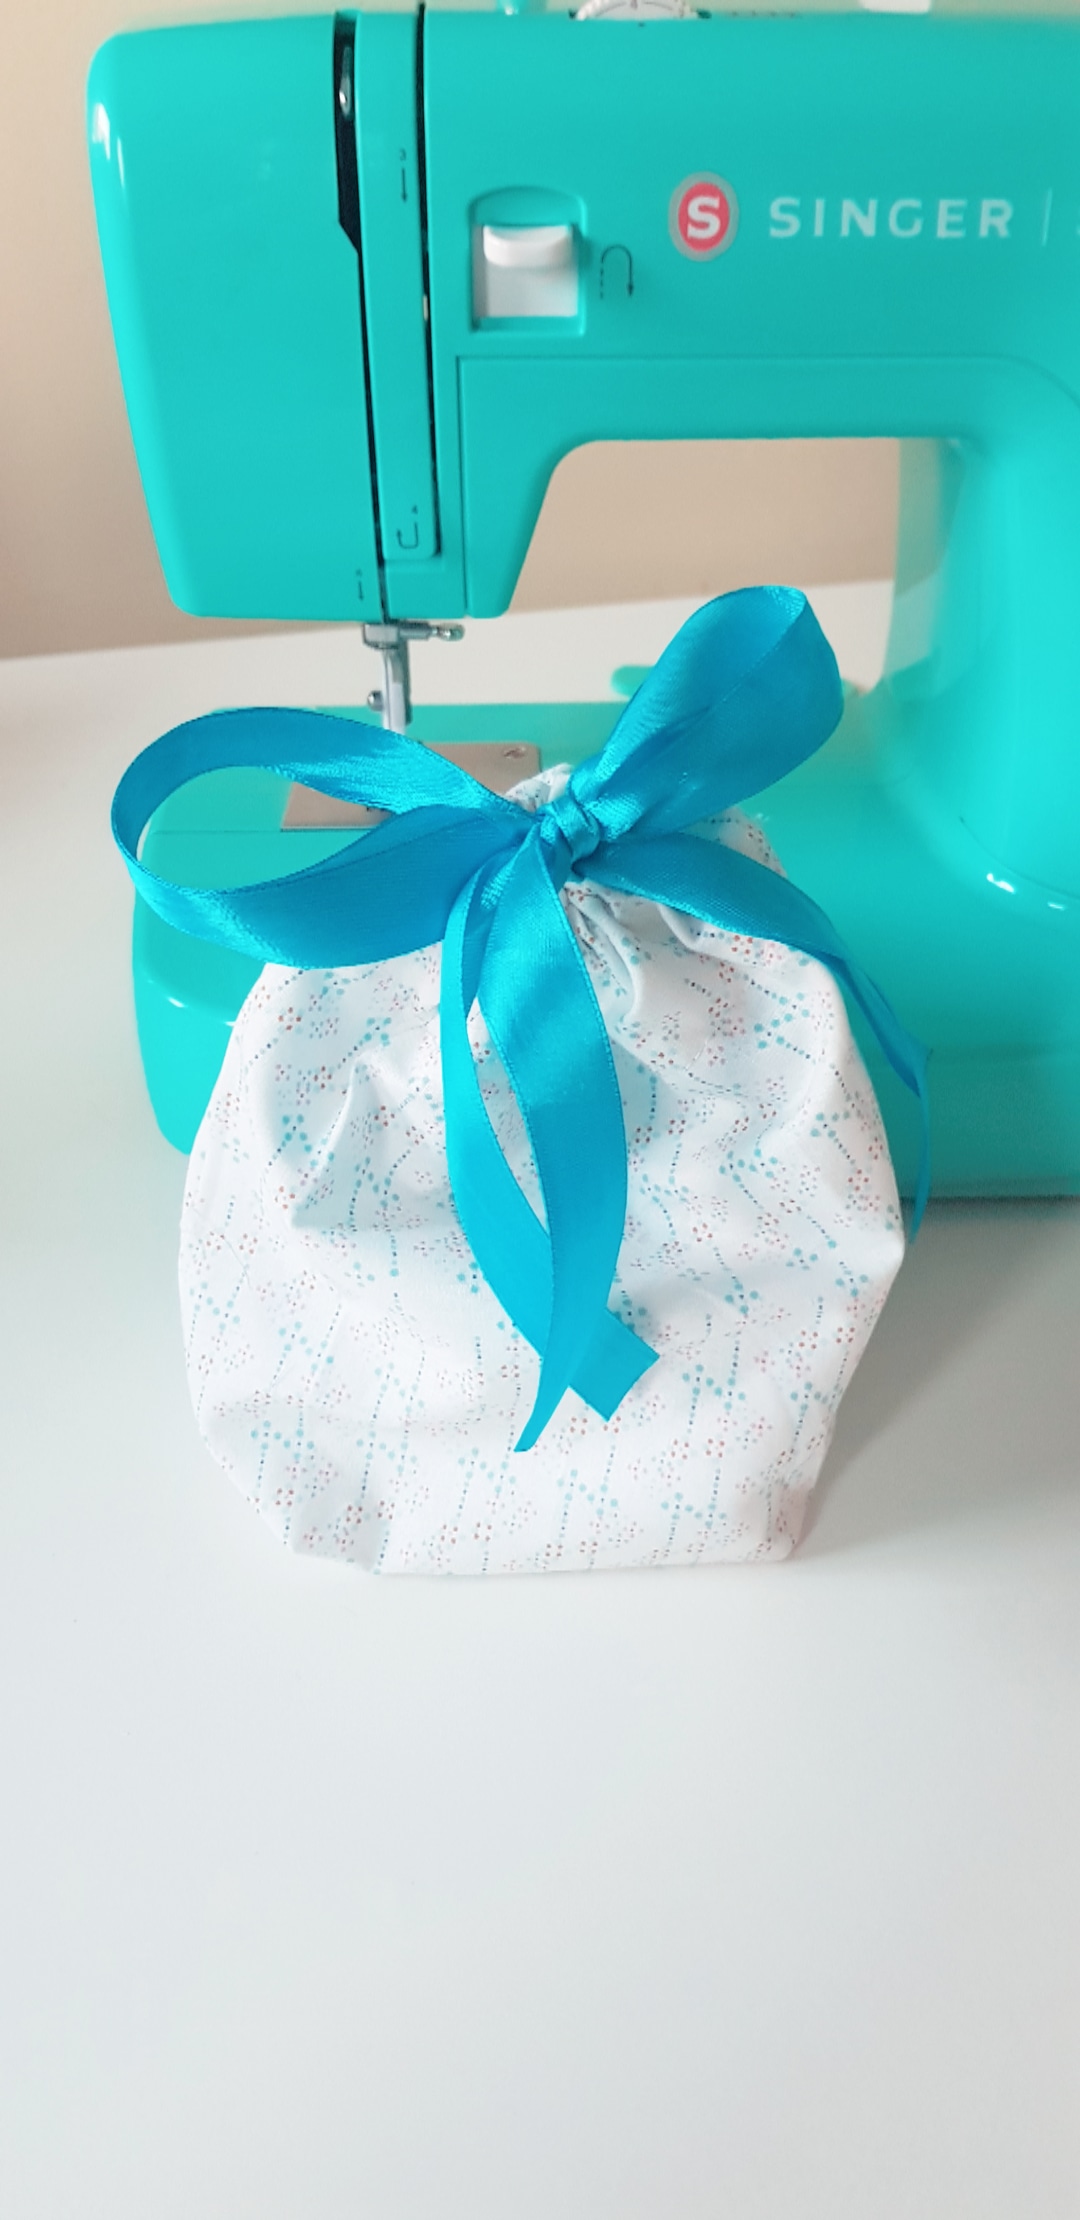
And that’s it. Ta-dah! You’ve made a string of double sided bunting! Here I’ve popped it in a small gift bag in matching fabric, ready to give to my goddaughter as her birthday present :)

 
Read more...
Happy Barnet Craft Challenge Gallery 2022
Jan 9, 2022
Happy Barnet Craft Challenge Gallery 2022
Jan 9, 2022

Challenge completed!!!
A gallery of completed craft projects from the Happy Barnet Craft Challenge 2022.

Read More →
Jan 9, 2022
Happy Barnet Craft Challenge 2022
Dec 31, 2021
Happy Barnet Craft Challenge 2022
Dec 31, 2021

The Happy Barnet Craft Challenge is back for 2022. Read our new craft ideas and prompts. Each month we’ll focus on one for fun and inspiration and another to encourage you to try new crafts and techniques. Wishing you all a crafty and happy year!

Read More →
Dec 31, 2021
The Happy Barnet 2020 Lockdown Project - Part  6
Apr 11, 2021
The Happy Barnet 2020 Lockdown Project - Part 6
Apr 11, 2021

Part 5 of my lockdown project, crocheting events and themes from 2020, the coronavirus and the lockdown.

Read More →
Apr 11, 2021
The Happy Barnet 2020 Lockdown Project - Part  5
Jan 20, 2021
The Happy Barnet 2020 Lockdown Project - Part 5
Jan 20, 2021

Part 5 of my lockdown project, crocheting events and themes from 2020, the coronavirus and the lockdown.

Read More →
Jan 20, 2021
The Happy Barnet 2020 Lockdown Project - Part  4
Jan 20, 2021
The Happy Barnet 2020 Lockdown Project - Part 4
Jan 20, 2021

Part 4 of my lockdown project, crocheting events and themes from 2020, the coronavirus and the lockdown.

Read More →
Jan 20, 2021
Happy Barnet Craft Challenge 2021
Jan 1, 2021
Happy Barnet Craft Challenge 2021
Jan 1, 2021

The Happy Barnet Craft Challenge is back for 2021. Read our new craft ideas and prompts on our two challenge lists, one for fun and inspiration and another to encourage you to try new crafts and techniques. Wishing you all a crafty and happy year!

Read More →
Jan 1, 2021
The Happy Barnet 2020 Lockdown Project - Part 3
Oct 15, 2020
The Happy Barnet 2020 Lockdown Project - Part 3
Oct 15, 2020

Part 3 of my lockdown project, crocheting events and themes from 2020, the coronavirus and the lockdown.

Read More →
Oct 15, 2020
The Happy Barnet 2020 Lockdown Project - Part 2
Aug 3, 2020
The Happy Barnet 2020 Lockdown Project - Part 2
Aug 3, 2020

Part 2 of my lockdown project, crocheting events and themes from 2020, the coronavirus and the lockdown.

Read More →
Aug 3, 2020
The Happy Barnet 2020 Lockdown Project - Part 1
Aug 3, 2020
The Happy Barnet 2020 Lockdown Project - Part 1
Aug 3, 2020

Part 1 of my lockdown project, crocheting events and themes from 2020, the coronavirus and the lockdown.

Read More →
Aug 3, 2020
Happy Barnet Craft Challenge 2020
Dec 29, 2019
Happy Barnet Craft Challenge 2020
Dec 29, 2019

The Happy Barnet Craft Challenge is back for 2020. Read our new craft ideas and prompts on our two challenge lists, one for fun and inspiration and another to encourage you to try new crafts and techniques.

Read More →
Dec 29, 2019
February 03, 2019 /Laura Barnet
how to, sewing
Craft Guides, How to
  • Newer
  • Older

Powered by Squarespace